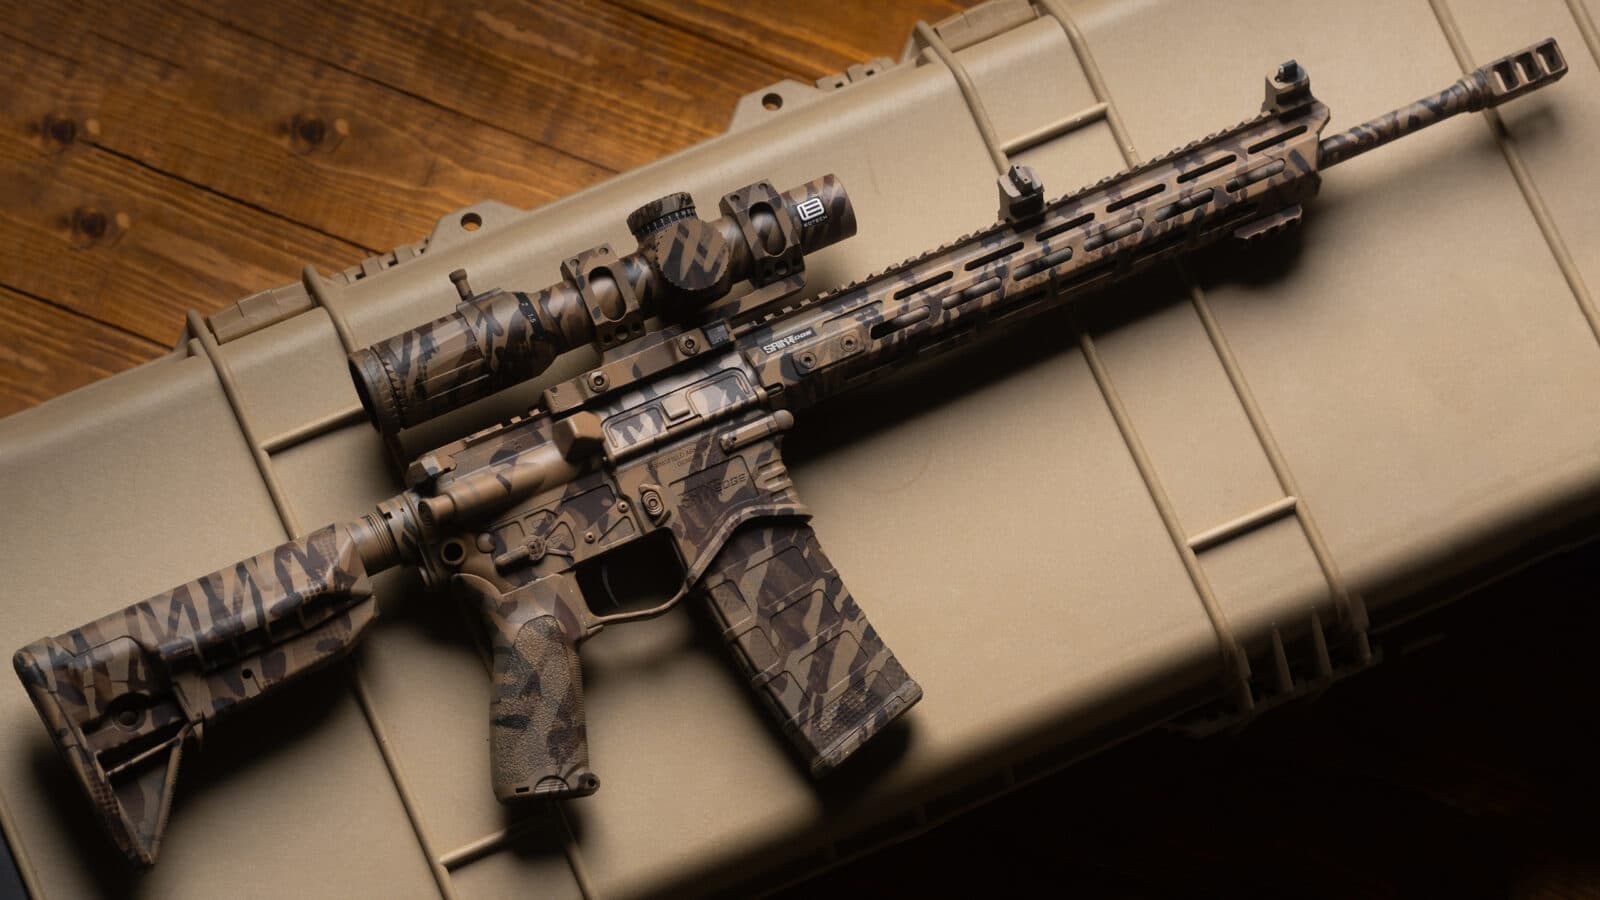
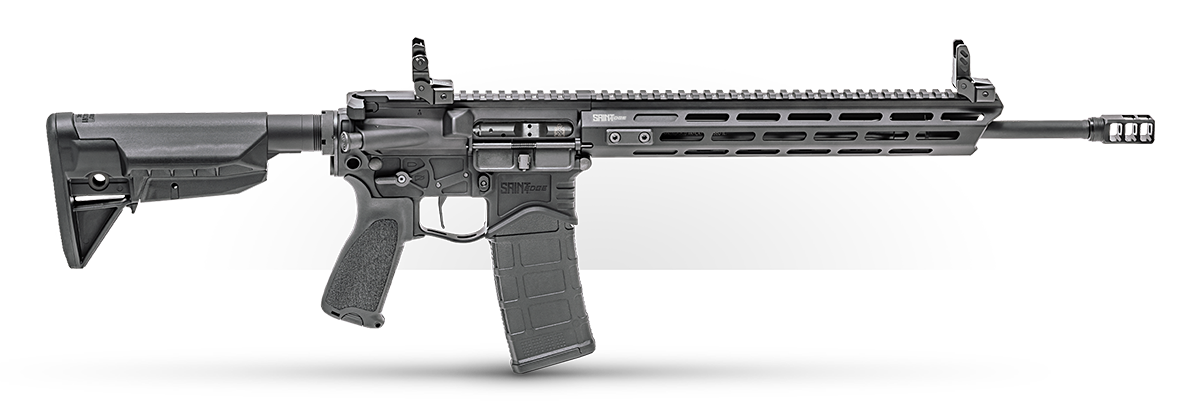
As with any DIY project, you alone are responsible for the work as well as the results should you use this dish soap method of spray painting your AR-15 or other firearm. The article is presented for informational purposes only, and you are encouraged to thoroughly research — and understand — everything you might want to do with your firearm. But admittedly, this is pretty cool.
When you are looking to camouflage or customize your rifle, one of the most tried and true methods is to bust out the ol’ rattle cans. Spray painting your rifle offers an easy, quick, cost-effective and unique solution. Whether you are seeking to camouflage your rifle into the environment or just make it look cool, a range of spray paint colors, various stencil techniques and pattern choices offers you a limitless array of options. The best part about spray paint customization to me is that you can repeat and redo it to your heart’s content.
I had seen the good, the bad and the ugly when it comes to custom DIY camo jobs, and it was on such a night while I was tumbling headfirst down a YouTube rabbit hole binge session of custom rattle can videos that I came across a few videos discussing the merits of the “Dish Soap” technique.
While this technique was completely new to me, essentially what I saw was a few guys producing some really wild and very professional-looking spray paint jobs by drizzling household dish soap all over their rifles and then spray painting over the soap, using it as a sort of liquid stencil, if you will. After using a garden hose to spray down the freshly painted rifles, an organic and professional pattern was left beneath.
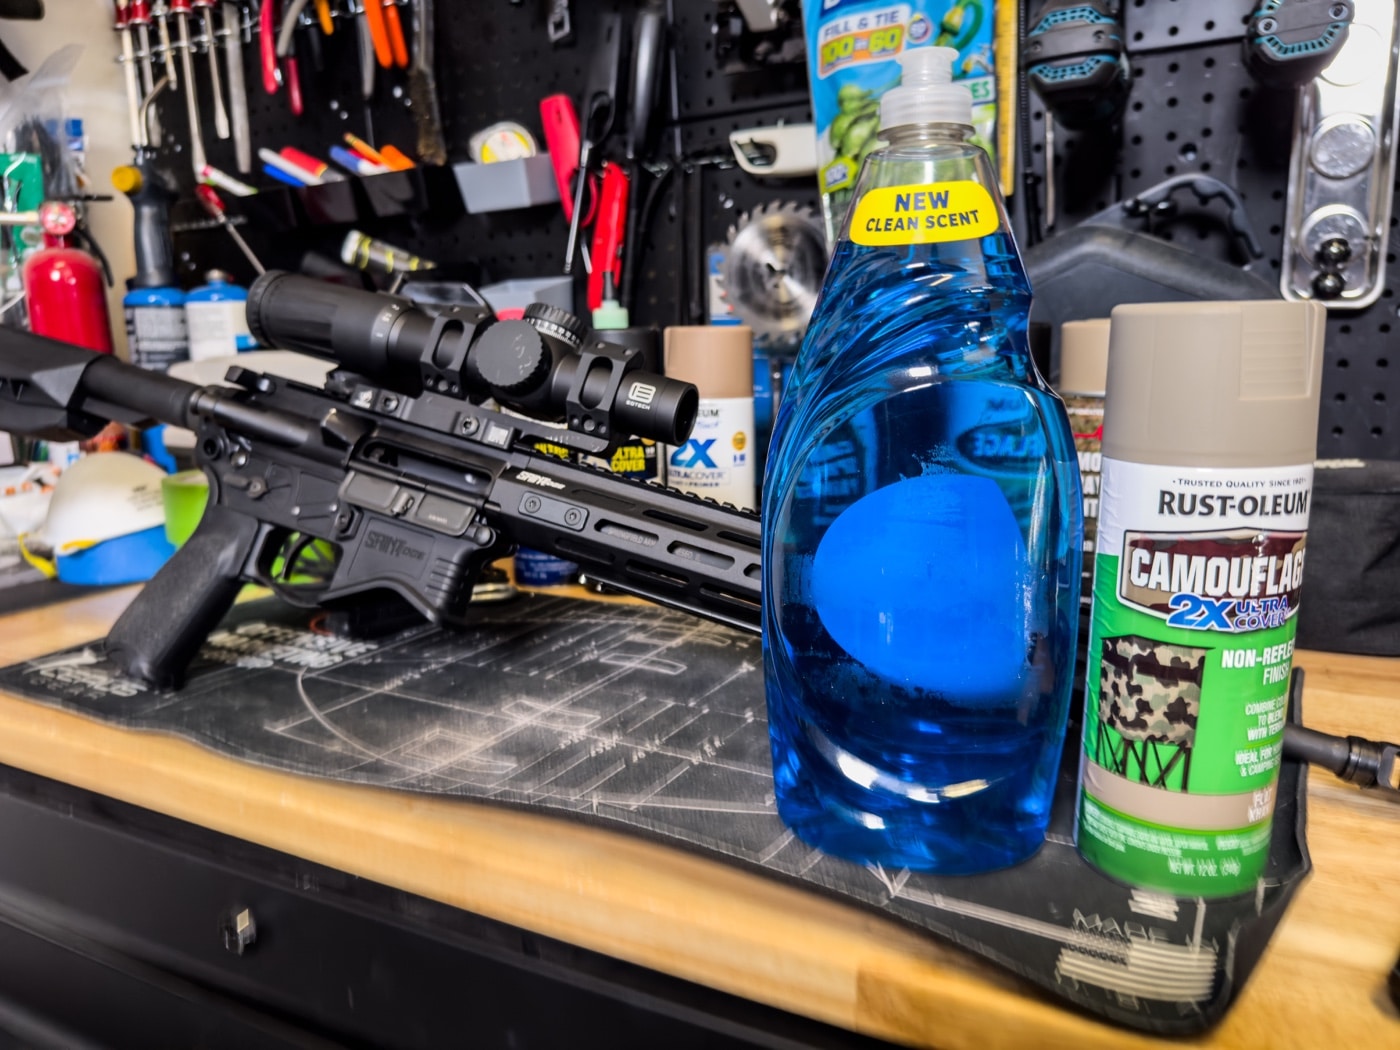
So, naturally, having more than a few black guns lining my safe, I decided to try my hand at the method and make a little weekend painting project out of the experiment to share with the audience at The Armory Life.
Step One — Clean Your Gun
I made a quick trip to the hardware store to replenish my camo color choices of spray paint and headed back to the home bench to clear my SAINT Edge rifle.
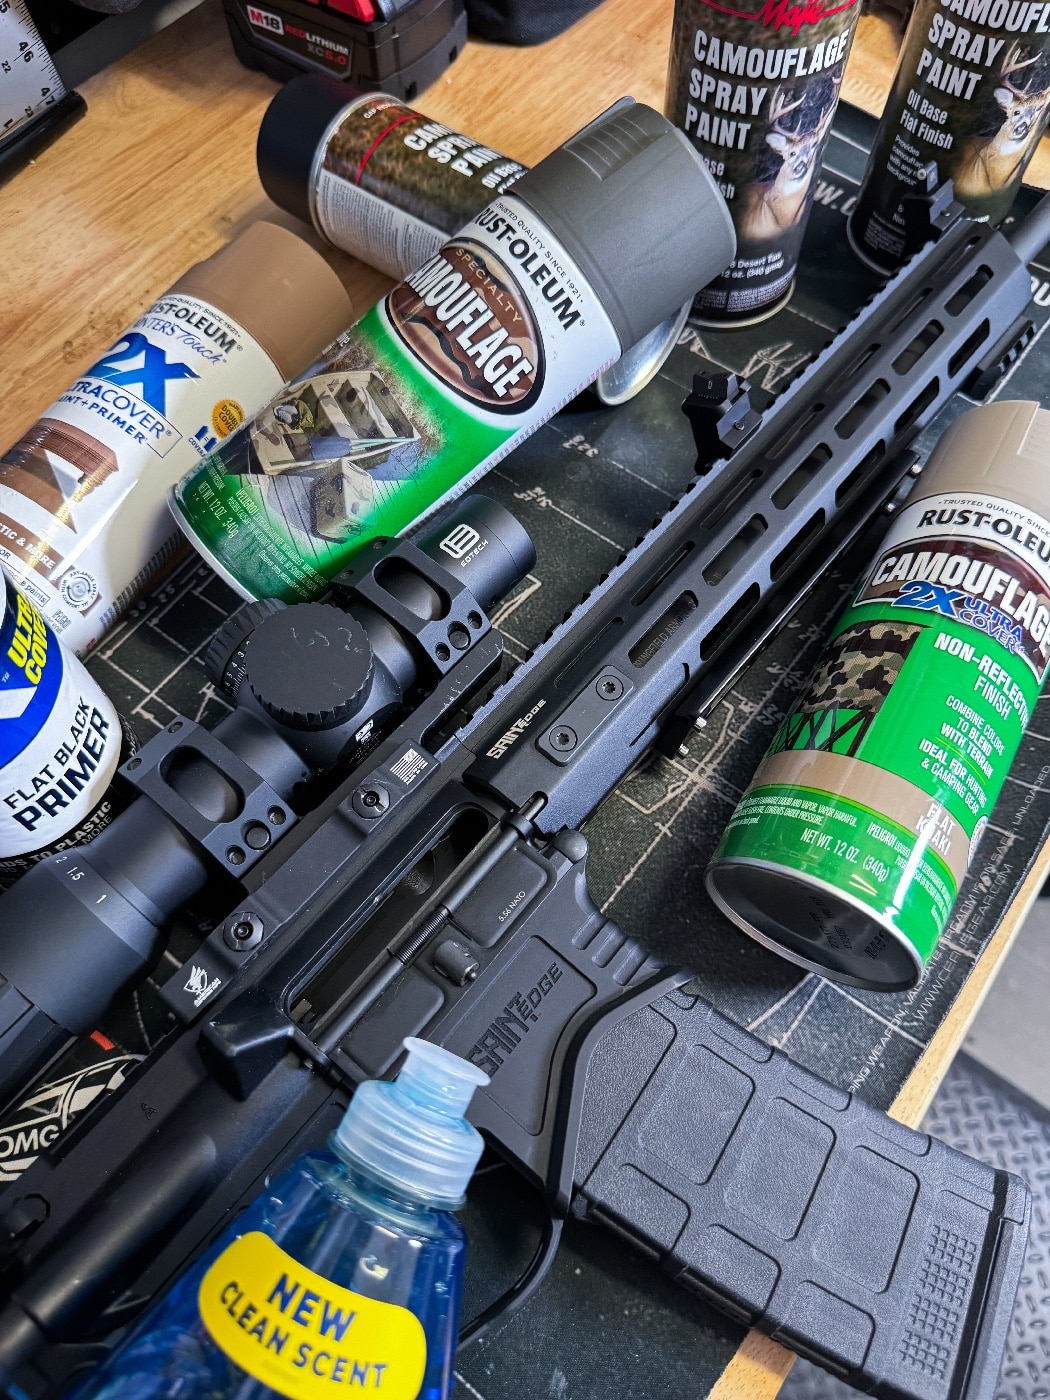
The first step before painting is to prepare and clean the rifle. After clearing the rifle for safety, I grabbed the can of Gun Scrubber. In order to ensure the paint has a dirt- and grease-free surface for adherence, you must remove the filth.
Gun Scrubber is a specifically formulated solvent that breaks down the grease and gunk and provides a clean painting surface. After spraying and wiping down the rifle, the residual gun oil and gunk from the range was removed.
Step Two — Taping Before Painting
Tape it off. Once I finished wiping the gun, down it was time to prepare the surfaces I wanted to keep free of paint. These included the optic’s lenses, any markings and indicators, and the trigger.
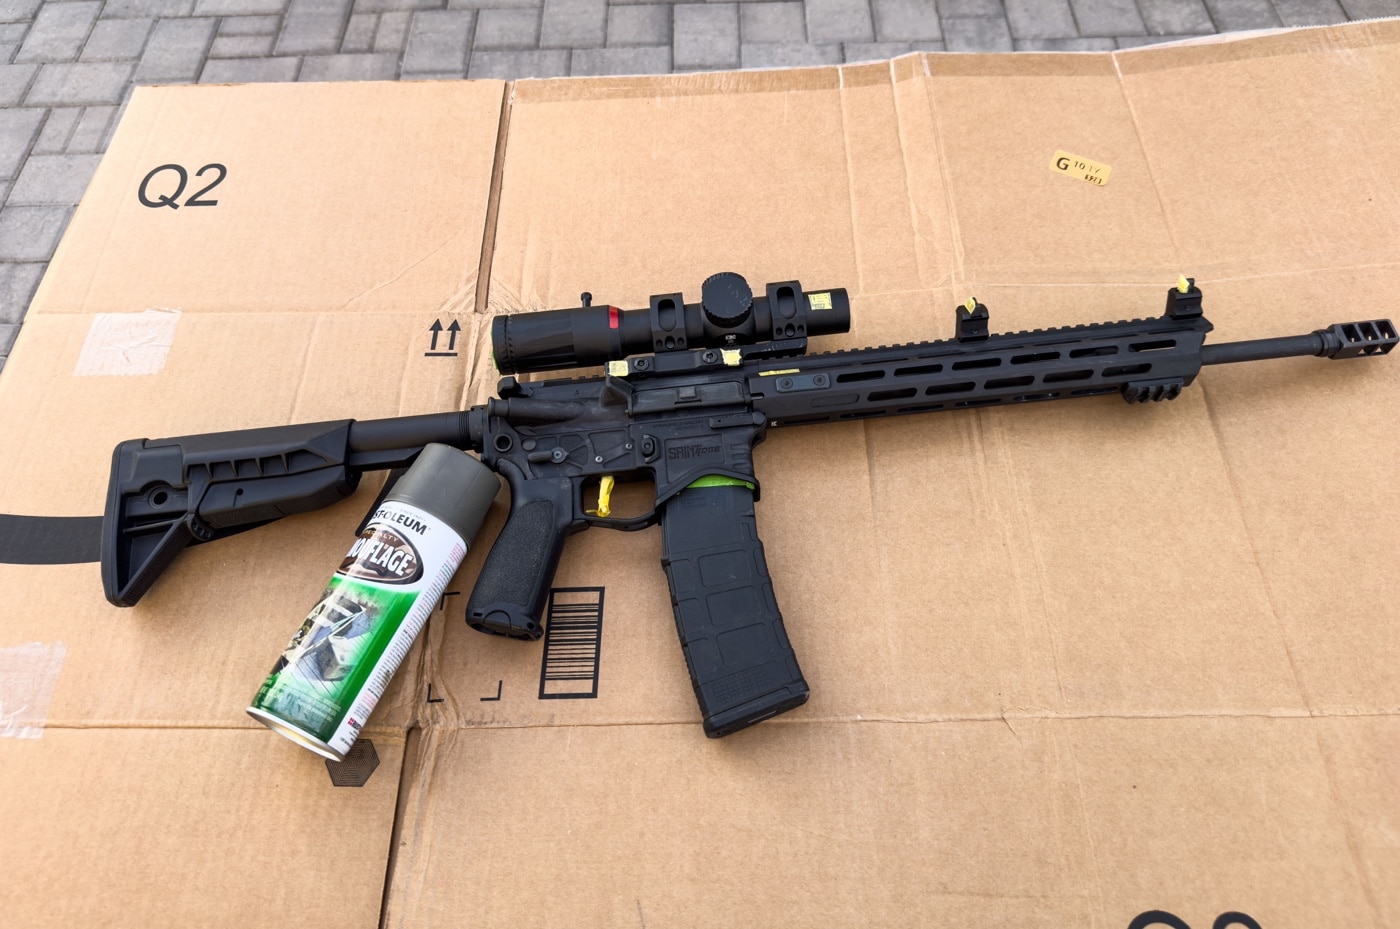
Take your time when taping; you’ll appreciate it later. I chose to preserve some of the brand markings across the gun and utilized both painter’s tape as well as model/pin-stripe tape to achieve a clean and precise masking area.
Step Three — Paint Your Gun
Start painting. Paint colors are a personal choice. It’s up to you to choose your color scheme based on your use-case for the firearm, and there are countless schools of thought on color and pattern choices.
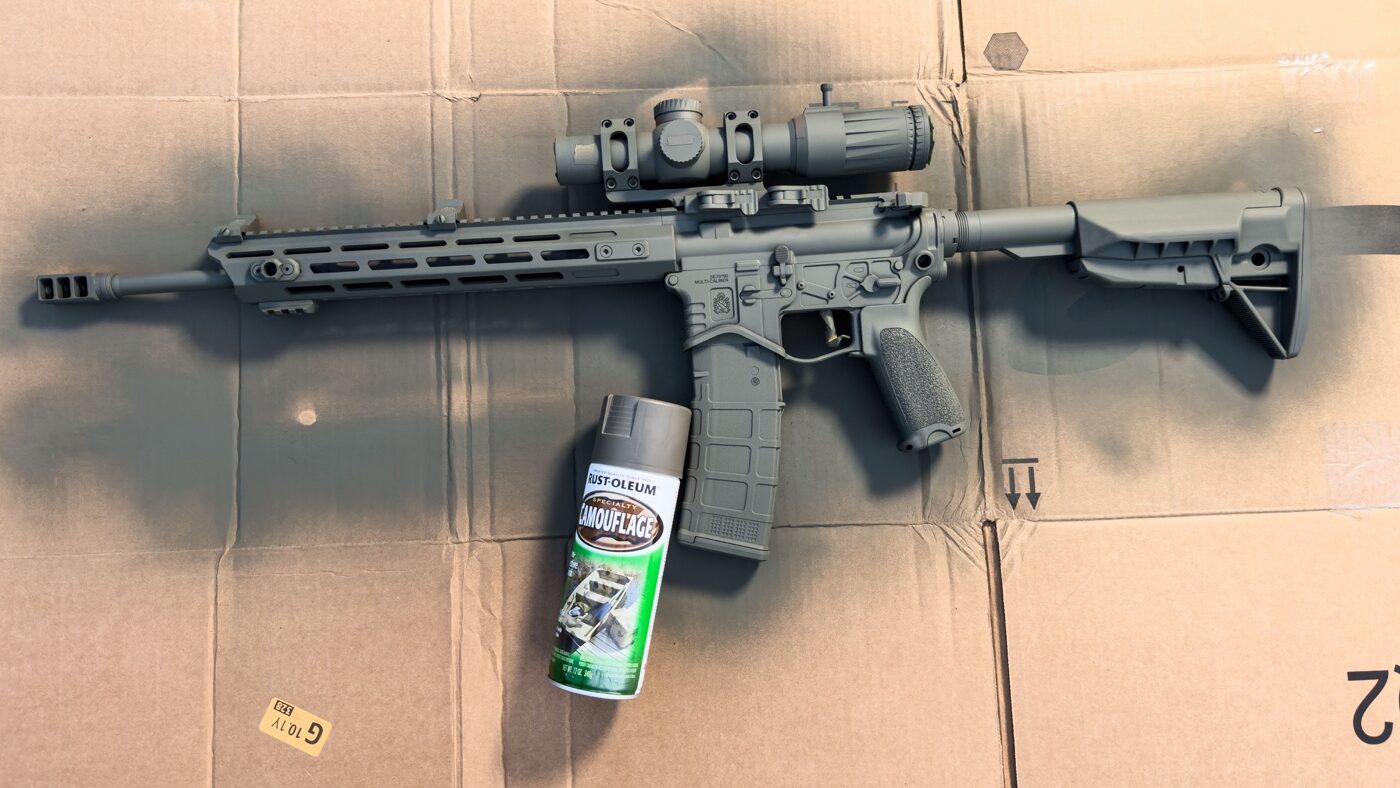
Traditionally, most people will utilize matte finish paint., and there are a wide variety of quality camouflage paint colors from major paint manufacturers from which to choose. My only advice when your DIY paint job technique involves layers of paint, particularly when it comes to using stencils — or in this case, dish soap — is to make sure that the base coat color choice is the color that you will want to see the least of. Save the colors of paint you want to see most for the following coats of paint you will apply after this base coat.
For my paint job, I wanted the majority of color to ultimately be light desert tan and sand colors to blend into my environment here in Arizona. As such, I chose an OD Green base coat as the darker color that will show through and break up the lighter tan and brown paint layers that would follow.
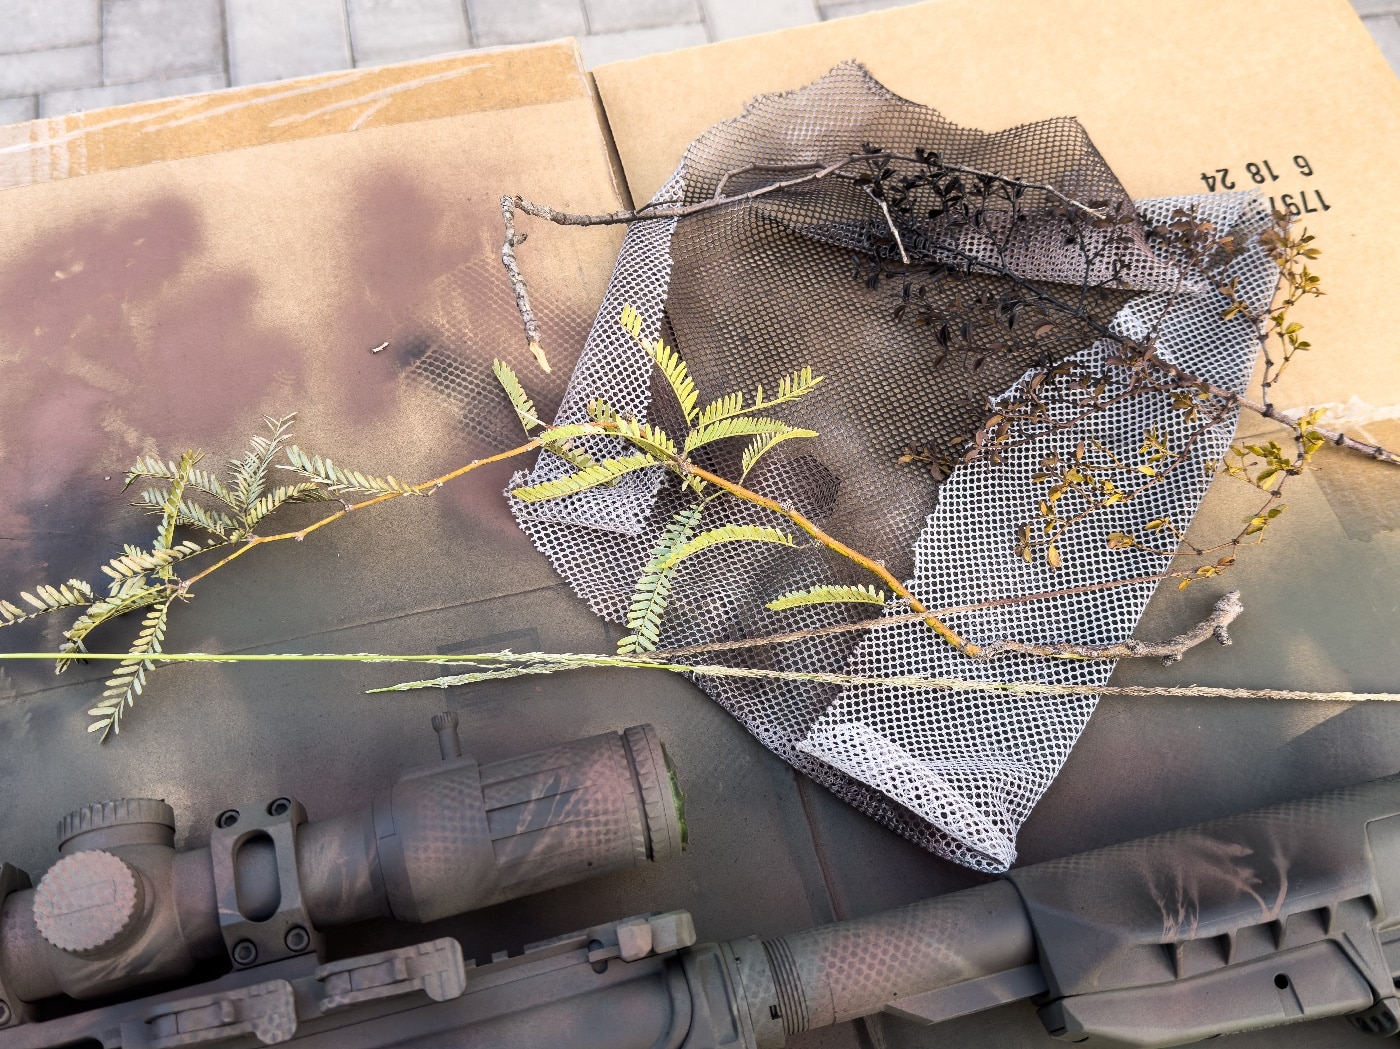
I fully coated the SAINT Edge on both sides with OD Green and let the base coat dry. Next, I decided to apply a little “texturing” by using a dark brown spray paint applied over some local desert foliage — like leaves and twigs along with a bit of netting mesh — to create patterns. These patterns break up and add depth to the OD Green color and look like natural environmental shadows.
After completing this “texturing” step on what I considered to be my base coat, I was ready to apply my main color coat of lighter tan over the entire rifle. It was time for dish soap.
Step Four — Apply Dish Soap
Dish soap coat! Using common household dish soap, apply dish soap in a directional stripe pattern, or pattern of your choosing over the entire side of the rifle.
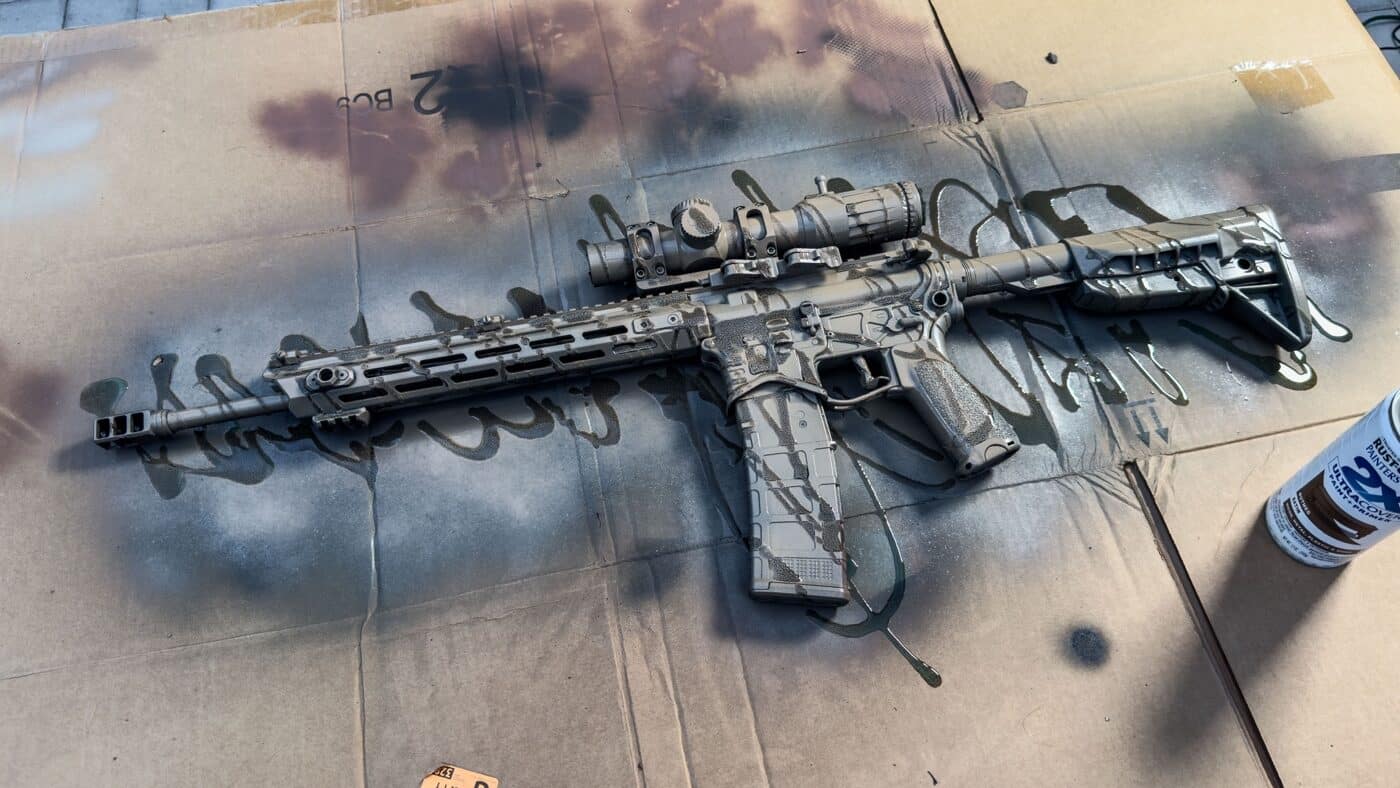
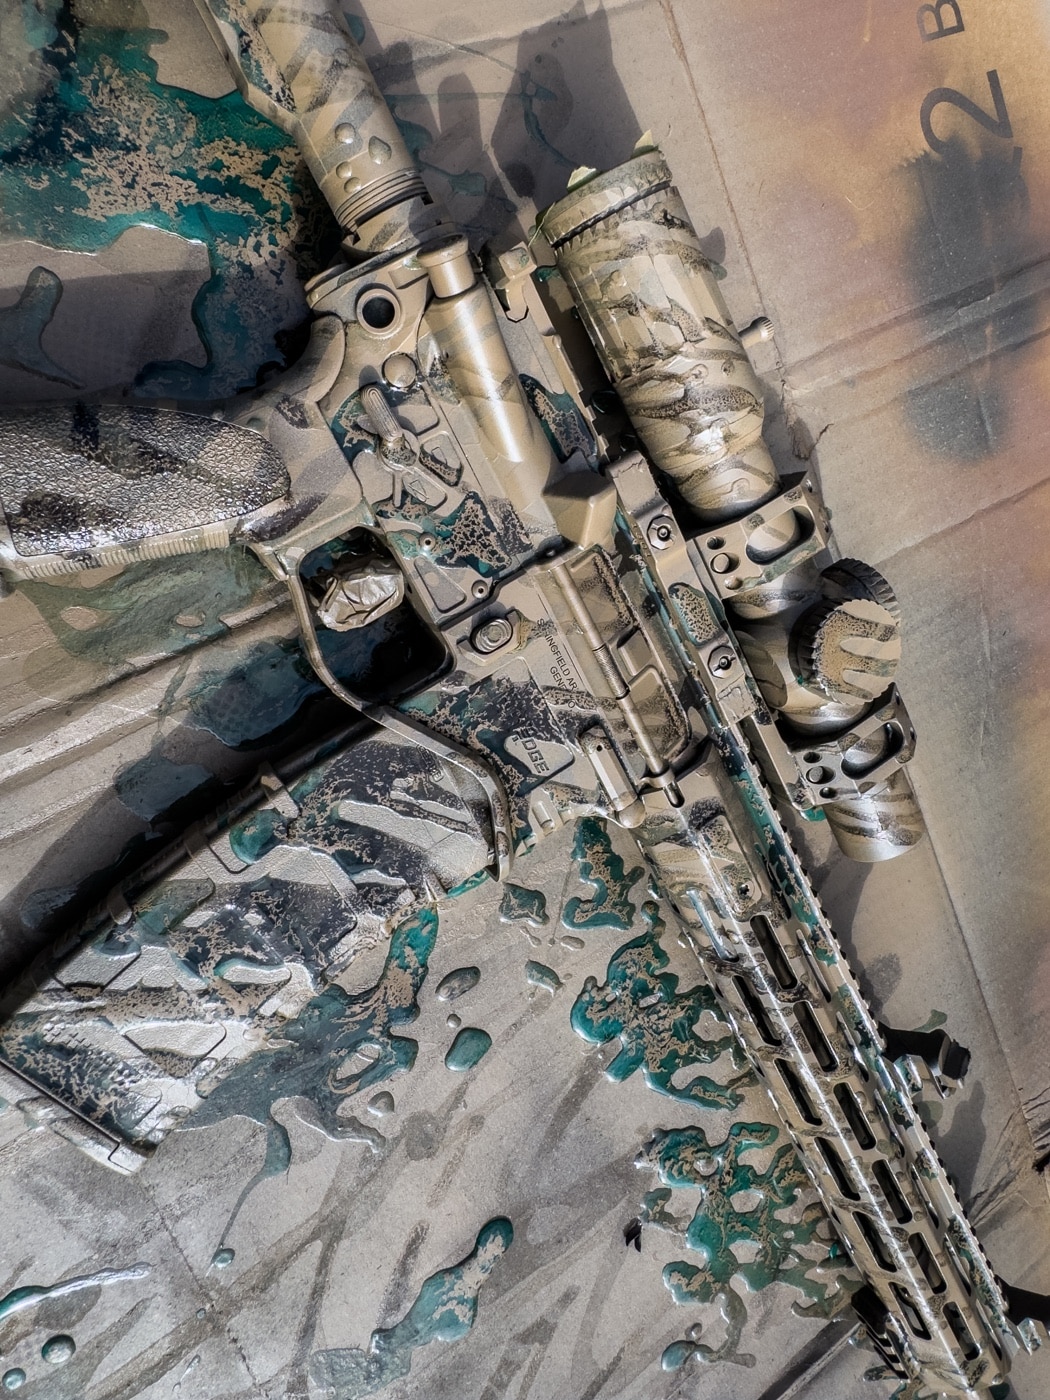
After drizzling it all over the SAINT Edge, I gave it a few minutes for the liquid soap to spread out on the rifle. The cool thing about dish soap and its liquid nature is that it spreads out in a very organic pattern. It also runs under and around contours of the rifle that may otherwise be hard to achieve by taping it off with painter’s tape.
Next, I applied the main coat of color (Desert Tan and browns) over the entire rifle. Instantly, you can see the soap repel the paint. Allow the fresh coat of paint on the dish soap to dry for approximately 15 minutes, or the “dry to touch” drying time recommended by your paint brand.
Step Five — Wash It All Down
Hose it off! Using a garden hose, preferably with a high-pressure spray nozzle, wash away the dish soap.
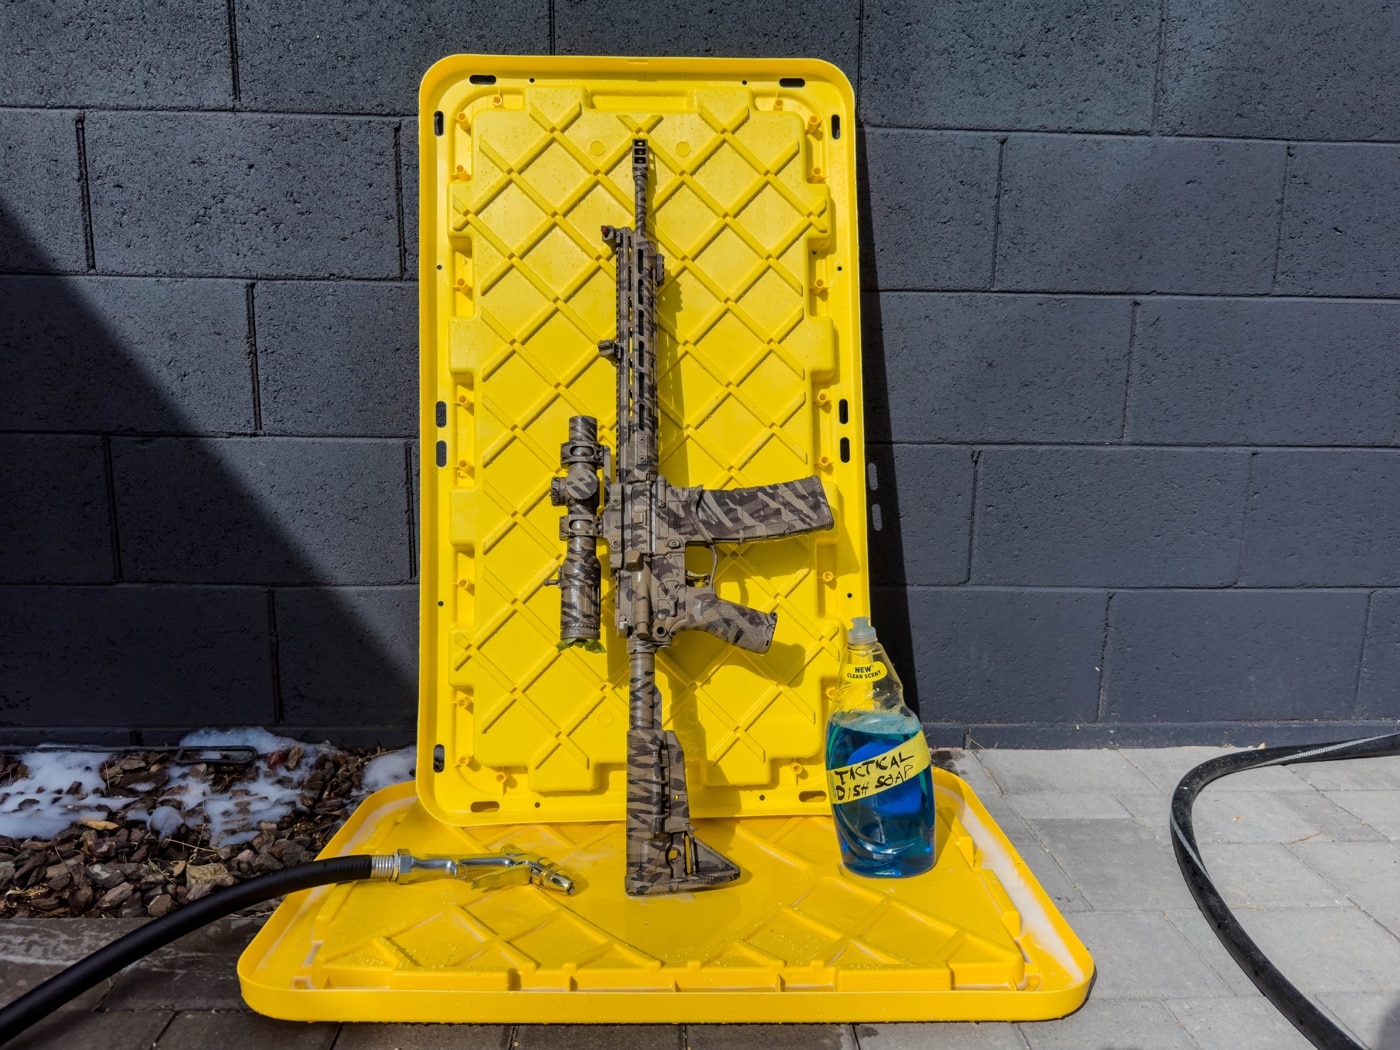
Don’t be afraid to really hose it down — you want to get all of that soap off of there, as these are tools that are made to be used. Get up in there. You’ll immediately notice the areas where it was applied as you reveal the first under-coats and patterns you had applied beneath it.
Step Six — Dry and Apply Additional Paint
Dry it off and inspect it. After wiping down the rifle gently with cleaning cloths, I also used an air compressor and high-pressure nozzle to blow away moisture throughout the rifle and in crevices. I highly recommend stripping your rifle down and drying it off thoroughly, inside and out, after you have rinsed it.
I liked the way the rifle was starting to look with the patterning, but I noticed that some of the paint started to look a little pink in areas like it may have been reacting with other paints or had oxidized in a weird way. I also like some of the darker patterning I had achieved in the initial coats.
So, I decided to pick up one more can of darker brown camo spray paint and add a little more patterning to it before applying a final dish soap pass.
Step Seven — Repeat as Needed
Spray, rinse and dry again. I will note that you may be perfectly happy with your rifle’s look after a single round of dish soap and paint.
Personally, I elected to apply another round of dish soap on both sides with a final coat of Desert Tan for good measure because I wasn’t. After a secondary pass, however, I rinsed away the dish soap and I had achieved what I considered to be a really cool look.
I really liked the layers of patterning beneath the last topcoat with dish soap and decided it was time to call it “good.” That’s the beauty of rattle can DIY: You can keep on spraying until you get it where you want it.
Now, it was time to lock it in and seal the deal.
Step Eight — Clear Coat Finish
Seal it up with a matte-finish clear coat. Once you have achieved a look you are happy with, it’s time to add a finishing clear coat to preserve and protect your work.
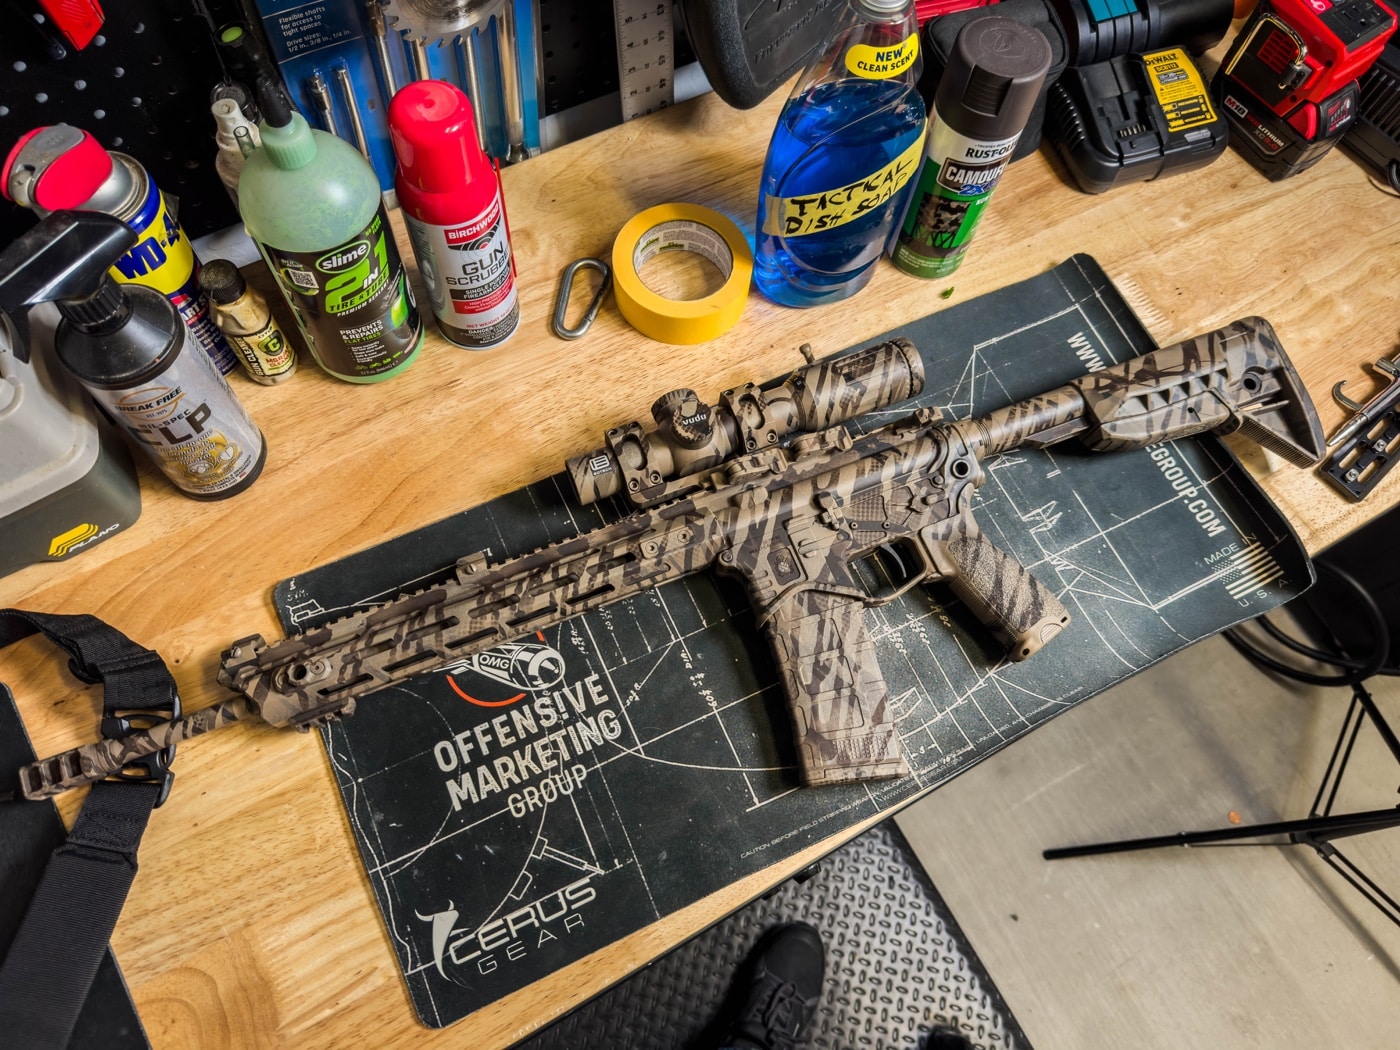
Clear coat helps prevent scratching and adds a little durability to your paint job. Word to the wise, make sure you use flat/matte clear coat finish. Don’t accidentally buy gloss, satin or semi gloss…It’s a mistake. Unless, of course, that is if you are really getting artsy and you want your rifle to look shiny and plastic.
Apply the clear coat as directed on the can in smooth even passes, and allow it to dry for the recommended time before handling.
Final Step — Wait for the Tape to Dry
That just leaves removing the tape and hitting the range. After you’ve allowed the firearm to dry and the paint/finish coat to cure for the recommended duration, you may peel off all of the masking tape. You’re now ready to take your one-of-a-kind custom DIY rattle canned rifle to the range.
Conclusion
I found the process of using dish soap to be fun, easy, cheap and repeatable. I like that it provided me with a unique paint job that enhances the camouflage capability of my rifle, and it’s a cool conversation piece now as well. The best part to me is, after I’ve scuffed it up during training and usage over time, I can get back to the drawing board and paint it again however I want.
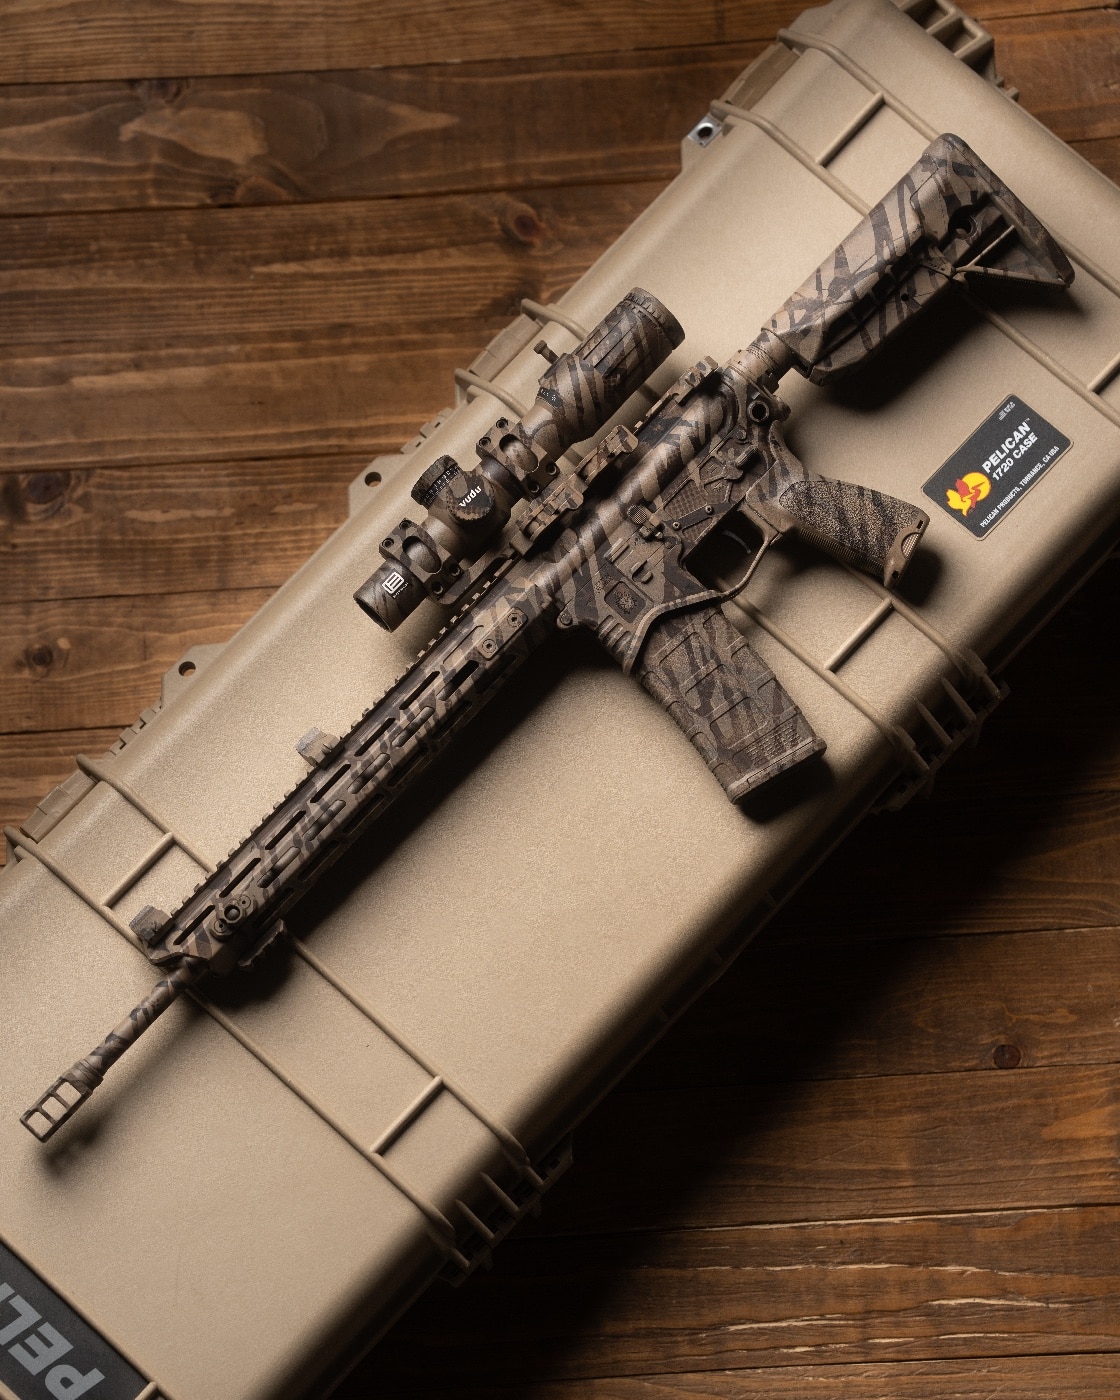
I enjoyed the process and think it presents a number of advantages to traditional masking tape or stencil approaches; mainly the organic look and time savings. Plus … my rifle was the cleanest it’s been in a long time after multiple baths in the backyard.
All joking aside, I look forward to hearing from The Armory Life community regarding their thoughts on this approach, and hope ya’ll will share some tips and tricks that you’ve applied to your own DIY rattle can jobs as well.
Editor’s Note: Please be sure to check out The Armory Life Forum, where you can comment about our daily articles, as well as just talk guns and gear. Click the “Go To Forum Thread” link below to jump in!
Join the Discussion
Featured in this video
Read the full article here

